
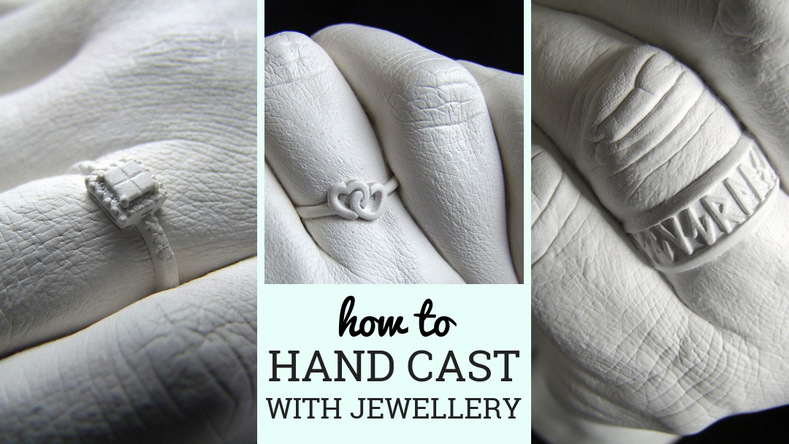
Show Your Rocks Off: How to Hand Cast With Jewellery
We completely understand that you want your hand casting to show off jewellery that’s just as much a part of you as your fingerprint! That might be your engagement ring, wedding band, or a gorgeous statement piece you have fallen in love with.
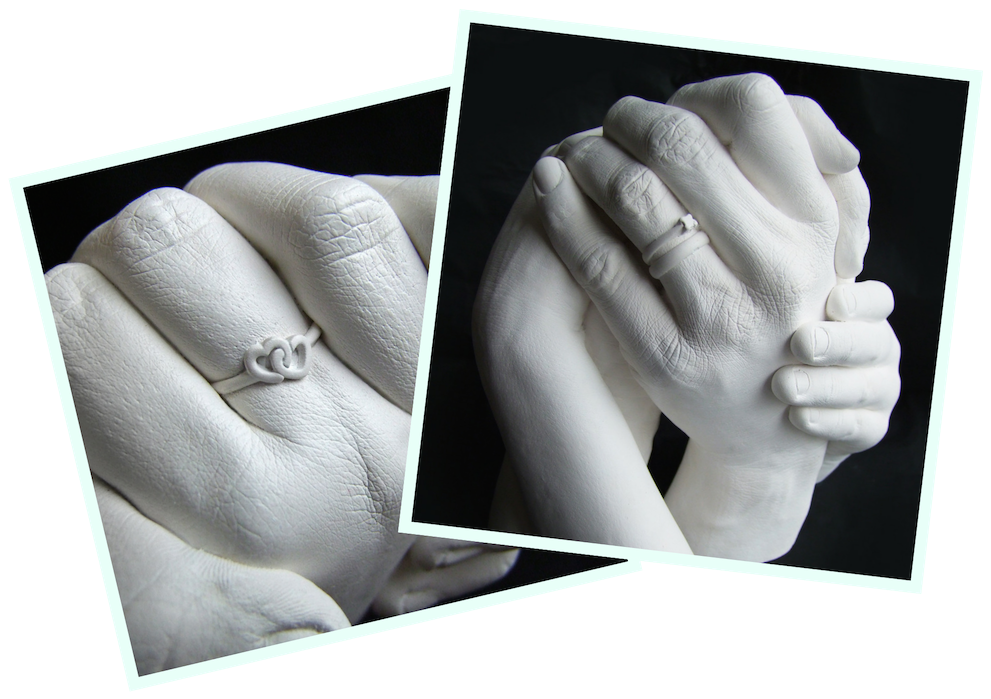
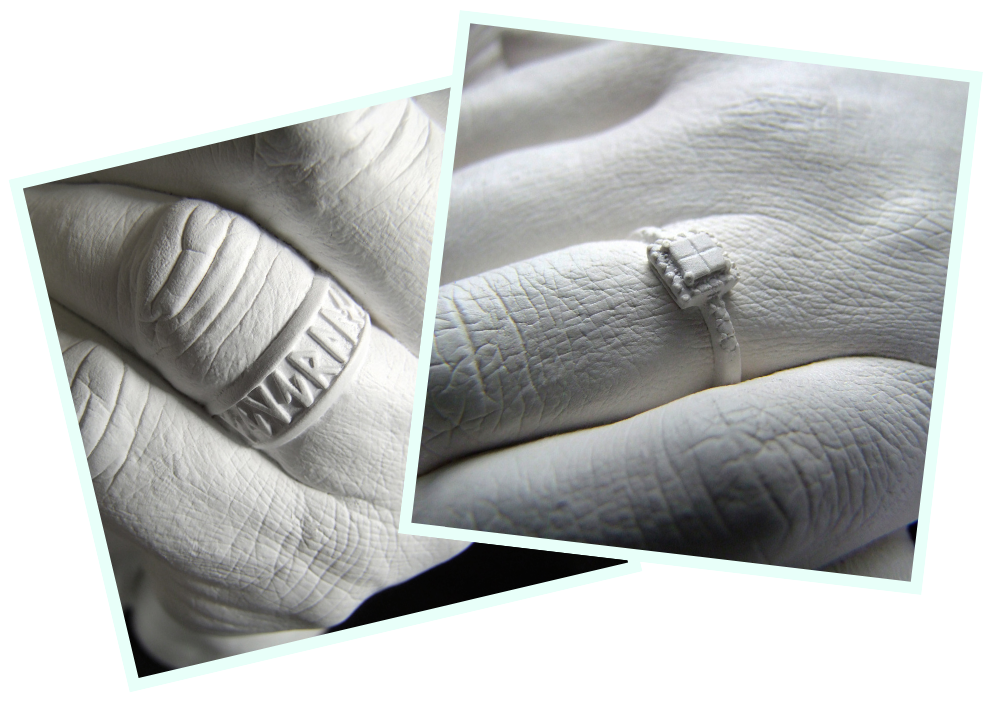
The great news is that hand casting with jewellery is totally doable. In our latest Facebook LIVE broadcast, we gave our essential tips for spectacular results casting rings and watches. As our demo showed, our alginate moulds adhere to jewellery and capture every detail, producing a cast that is the perfect twin of the real thing.
Before you dive in to start casting all your favourite bits of bling, there are some golden rules of hand casting with jewellery that you need to know. Scroll down to watch our video demo, or read on to find out more.
6 Golden Rules of Hand Casting with Jewellery
1. Wear the right jewellery
Keep it simple - Plain, embossed and engraved wedding bands work very well. On the flipside, casting results won’t be great with rings that have a rough surface.
Size doesn’t matter - You can cast large statement rings, and engagement rings with striking stones and settings, so long as the design doesn’t overhang the finger.
Mind the gap - Only cast rings and watches that fit snugly. If there is any movement or spaces, the stone mixture will pool, creating unsightly bulges in the finished cast.
Use common sense - It may be stating the obvious, but don’t plunge a watch that isn’t waterproof into alginate jelly!
2. Take care removing your hands
When the mould has set – which usually takes about 2-3 minutes – remove hands carefully. The person wearing the most jewellery should take their hands out first, gently lifting their fingers away from the cast before slipping them out of the mould.
3. Make a paste to paint onto detail
When you have removed your hands, swill out the mould with water. If you can see the contours of your jewellery within the cast, take a small amount of the stone powder provided in our kit to make a paste with water. Paint the paste into the imprint of your jewellery, which will help the stone mixture adhere well to these areas.
4. Tap and roll when filling the mould
Continue the casting process, filling the mould with the stone mixture, rocking and tapping to get air bubbles out, and making sure that the mixture fills every tiny space.
5. Peel away alginate from top to bottom
After 30 minutes or so, your cast should be set and it’s time for the big reveal. Resist the urge to tear away the alginate frantically! Go for a slow, methodical approach, peeling chunks away from top to bottom. When you get near the bottom, you should be able to gently lift your cast away from the mould, releasing it a little at a time.
6. Finish and enjoy
Our kits provide a wooden tool for picking away any flecks of plaster created by air bubbles. Use this to improve the finish of your cast.
If you follow our golden rules, you should find that your hand cast perfectly clones your hands, complete with jewellery. We’ve seen amazing results with incredible detail, down to the facets of a gemstone and the tiny detail of ring settings.
If you want more jewellery casting tips, please watch our video:
Want to try for yourself? Get your casting kits here. Happy casting!