
How To Make A Stunning Hand Cast Wedding Centrepiece
 When you have just 24-hours to enjoy it, it's natural to want your wedding day to be perfect and a true reflection of your character as a couple.
If you're looking for a way to personalise your wedding décor, we've got a stunning idea! How about casting your hands with our Couple Casting Kit and using your sculpture as a table centrepiece?
You could introduce a simple couple hand cast to the decor scheme, perched on a wood slice, or displayed under a glass cloche. But we have another thought!
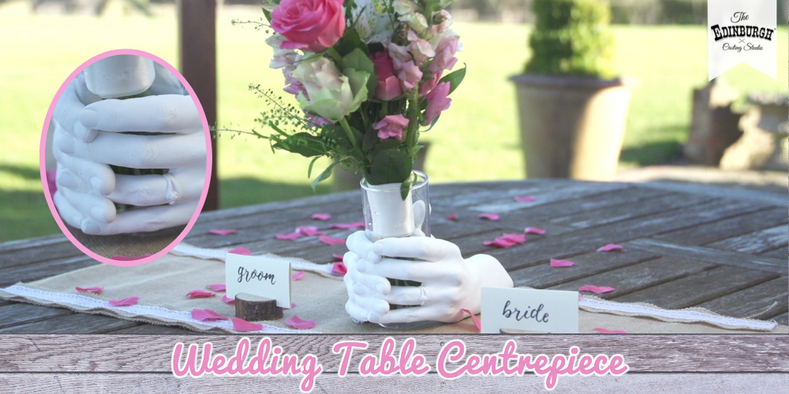
Your couple hand cast can be made in a way that leaves space for a vase, ready to hold your bouquet when you arrive at the top table. Not only is this a beautiful decorative touch, but it's also a practical solution to the problem of where to put your posy!
Watch our 'How To...' video, which shows this wedding centrepiece casting in action!
Step-by-Step: How To Make A Stunning Wedding Centrepiece
1. Swat Up!
Read through the instructions in your Couple Casting Kit carefully and assemble the materials. Our kit contains everything you need, except for a large plastic bowl, scissors, measuring jug and an electric hand mixer.
2. Grab a Candle
For this casting, you hold a candle between your hands to create a space that you can slot a vase or a tall high-ball glass into. Choose a church candle of the same diameter, or a touch larger, than the vase you want to use.
3. Rehearse
Just like the wedding itself, there's only one chance to get this casting right. We suggest a rehearsal before you take the plunge! Practise clasping one hand each around the candle and dipping your hands into the bucket. Make sure you can hold this position comfortably for 2-3 minutes.
4. Make Jelly
Measure out water according to our instruction booklet, then begin adding alginate powder, using an electric hand mixer to smooth out all the lumps. The mixing must be done within a minute, so set a timer. As the powder dissolves into the water, it is transformed into gloopy pink jelly.
5. Take the Plunge!
Strike your pose, holding the candle, and plunge your hands into the jelly. Make sure that you don't touch the sides or bottom of the bucket while you hold as still as possible until the jelly become white and rubbery.
6. Be Free
Ask a helper to loosen the mould around your wrist. Wriggle your fingers until you feel the mould release its grip. One at a time, slide your hands out. Be sure to leave the candle inside the mould.
7. Set in Stone
Measure out water in a plastic mixing bowl, as instructed in our booklet. Add the stone powder provided and mix it with gloved hands, making sure you break down any lumps. Pour the mixture, a quarter at a time, rolling the casting bucket to make sure the liquid runs into every part of the mould. Repeat this until the mould is full and tap the sides of the bucket to make air bubbles rise to the top.
8. Crack Open the Champers
On the subject of bubbles, you have half an hour off now to wait for the stone to set... Why not pop open some fizz and toast your future together! But don't go crazy, you still need to finish off your masterpiece...
9. Peel & Reveal
Turn the casting bucket upside down and give it a little squeeze. The contents should release onto your worktop so you can slide the bucket off. Take a knife to make a few light incisions into the mould, then have some fun peeling chunks of alginate away until your cast is revealed.
11. Coo Over the Details
At this stage, you will be blown away! Your hands intertwined with those of your sweetheart will be faithfully cloned. Every tiny line in the skin and the beautiful details of your engagement ring will be there to see!
12. Ready For Your Big Day
The slippery surface of the candle makes it easy to slide out, so you can pop your vase inside. Congratulations, your finished hand cast is now ready to add the most personal touch to your wedding table décor.