
Baby Feet Casting: Make a Baby Love Heart Casting
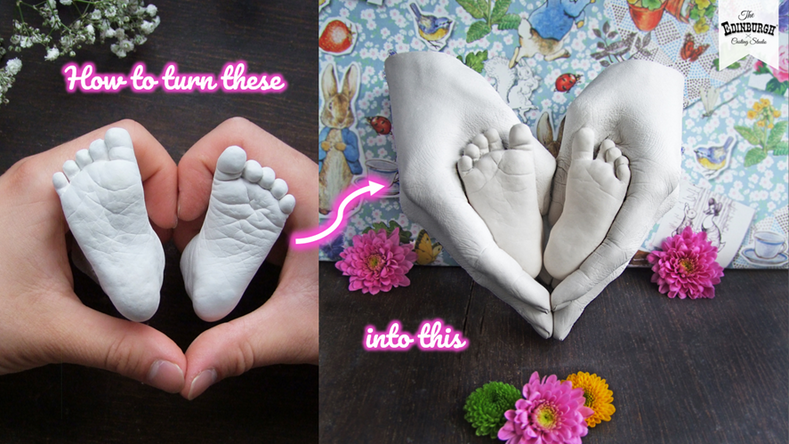
We challenge you not to swoon over our Baby Love Heart Casting! It's a gorgeous two-part casting, made by creating baby feet casts first, then combining them with a hand cast. It looks incredibly intricate and beautiful, but it is actually quite easy to make, if you know how!
Stage 1: Baby Feet Casting
Using our Baby Feet Casting Kit, you can create two pairs of baby feet. This means that you can keep one adorable set to display on its own, and use the other set to make the Baby Feet Heart Casting.
Assuming you've created baby feet casts, using our kit, and following the instructions in the booklet included, we'll move on to the combined casting.
Stage 2: Combining the Casts
The trickiest bit to master here is how to hold the baby feet casts in your hands. How easy that is depends on the size of the foot casts and the size of your hands. Practice makes perfect, so have a play until you find a position that's comfortable for you. Baby's toes face upward, nestled into the nook between your thumb and first finger; and your fingers are closed, pointing downward, fingertips touching.
Practise this hold, and try immersing your hands into the casting bucket to check you will be comfortable in this position for 2-3 minutes while making the mould. When you're satisfied you know what you're doing, it's time to get casting! You need a Family Casting Kit for this stage.
Assign whisking duties!
Follow the instructions given in the kit you are using. The first stage of hand casting is to mix the alginate using an electric hand mixer. You'll need a recruit to do this for you within one minute, starting slowly, then ramping up the speed for the last few seconds. The casting jelly will be pink and gloopy!
Make your mould
Position hands as practised, comfortably but firmly holding the baby feet casts. Make sure that none of your fingers are touching the sides or the bottom of the bucket and stay as still as you can until the jelly sets. It should only be a couple of minutes or so, and you will know you're safe to remove your hands once the jelly turns white and firm.
Wriggle free
Gently release your fingers from the baby feet, slipping one hand at a time out of the mould. Do not try to pull the baby feet out of the mould (this would be a disaster)!
Set in stone
Mix the stone mixture and then pour it into the mould, as instructed, a little at a time. Roll the bucket at intervals and tap the sides to get the stone mixture into all the little spaces left by your hands. As this is an intricate casting, spend time tapping the sides firmly after all the stone mixture has been poured in. This will help air bubbles rise to the surface, as well as preventing the water and plaster from separating and creating channels in your cast.
The stone needs about half an hour to set, so now is a good time to have a clear up and make a brew!
Big reveal
This bit is super exciting! Slide a butter knife around the inside of the bucket to loosen the alginate, then turn the bucket upside down and gently squeeze the sides to release the mould. Lift off the bucket, start to peel away the alginate. You can use a butter knife to make a few nicks around the edge to get your fingers into. Be very careful not to snap anything off; slow is best! Be gentle, working down from the top to the bottom of your cast, magically revealing your beautiful cast, one tiny detail at a time.
Finishing touches
When you only have a bit of alginate left in the crevices between fingers, and the gaps between the baby feet and the hands, use the wooden tool provided to pick these out and remove bubbles of plaster. Finally, wipe off any residue with a cloth. It's our hunch that gasps of wonder might be released just about now!
Simply stunning!
If you're a new parent, this creative casting could be a wonderful family keepsake, symbolising the never ending love you have for your little bundle of joy. It seems complex, but as you can see it is really quite easy, if you follow the expert tips in our booklets, written by our team of professional casters. We think we've covered every detail, but if you have a tip of your own, please share it with us!
If you'd like to buy the kits to make this yourself, please visit our shop. We'd love it if you'd share photos and video of your casting experience with us! You can do this by emailing us directly, or joining our Facebook Group.
Happy Casting!